
12 Security Features Your Web Hosting Provider Should Have
Ankush Das on April 27, 2022


Here is a step-by-step guide to getting you started with your WordPress site on SiteGround hosting.
Launching the WordPress site is easy, but if you’ve never done it, you may have hundreds of questions, and this article will help you with that. By the end of this tutorial, you will have fast loading functional WordPress site.
After this tutorial, you will be able to set up web-hosting in under 30 mins.
So come out of your qualms and let us share the procedure to host your WordPress site on SiteGround.
This raises two questions, why WordPress and why SiteGround?
More than 60% of websites are hosted on WordPress.
It’s one of the most beginner-friendly content management systems (CMS). Building up a website can’t be easier than this.
There are countless free themes and a vibrant community to help you keep going. In addition, you can have numerous plugins (free and paid) to add to the features.
WordPress helps you in
…and do whatever is possible with a website.
SiteGround is among the three WordPress – recommended hosting providers, the other two being DreamHost and Bluehost.
And when you look at the features, it’s easy to guess why.
SiteGround uses Google Cloud as the underlying cloud infrastructure to deliver fast-loading websites. It helps you take advantage of Google Cloud’s low-latency platform, multiple data centers, and performance-oriented tech stack. Simply put, your website will be hosted on Google Cloud. Additionally, it helps in quickly backing up websites in the event of server failure.
Their caching technology ensures that resource-intensive elements of your web pages, like images, load faster from their servers. Additionally, with the full-page cache, their hosted websites enjoy a speed boost from 50% to 500%.
This is especially useful if you’ve got a data-driven website. SiteGround’s unique MYSQL setup smartly manages such requests to keep your website loading faster even under heavy loads.
SiteGround remains updated in terms of the PHP versions they use. Besides, they have a unique PHP setup that aids in reducing the loading times by as much as 30%.
This is a free plugin offered by SiteGround to its users. It helps in tinkering with some critical parameters to boost your site performance. This helps to choose PHP versions, image optimization, enable lazy loading, etc., to help run your website at its best.
SiteGround has 6 data centers spanned across 4 continents. Add in the 194 content delivery network (CDN) locations, and you have a perfect recipe for a blazing-fast website with maximum uptime.
Apart from the above, SiteGround has a reputation for integrating the latest technologies into its hosting platform.
SiteGround has various plans for you to hit the ground easily. Their managed WordPress hosting starts from USD 3.99 a month for the first year.
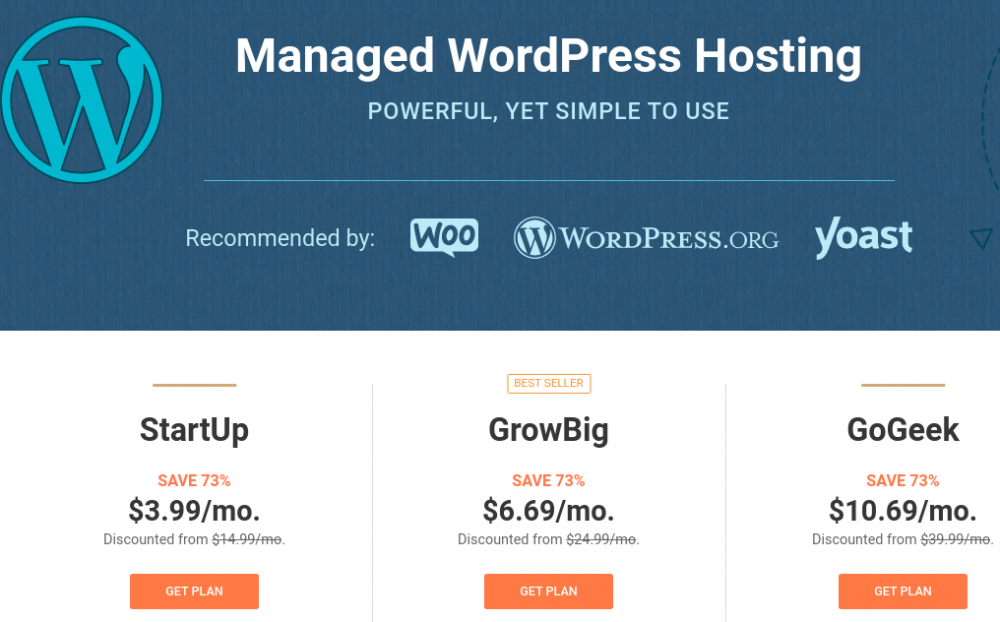
Depending upon your requirements, you can select any plan and then scale in the future. And for peace of mind, all plans come with a 30-days money-back guarantee.
Now let us proceed to host WordPress on SiteGround. We are already on the StartUp plan for this demo.
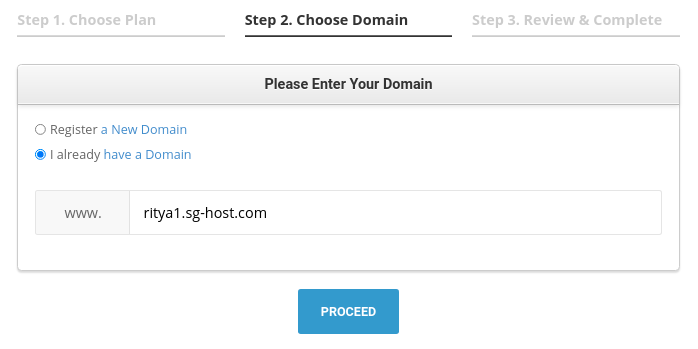
The next step is to register a new domain or use an old one. For a new domain, you can purchase either from SiteGround or from any other domain registrar (GoDaddy, Namecheap) and use it here.
But there is an extra step for domains purchased anywhere else. You have to update the nameservers at your registrar.
For this, navigate to your SiteGround website dashboard area and copy the nameserver information. Finally, update your registrar’s domain section with these server addresses.
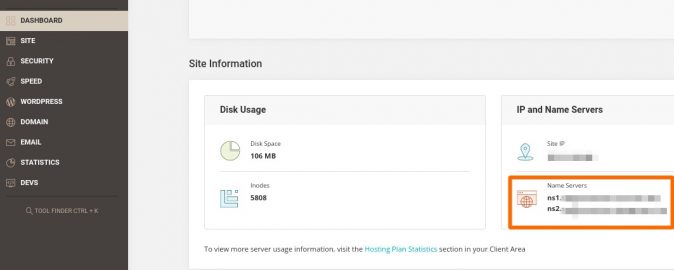
While this may sound complicated, it’s like updating your Facebook profile. Just google the process for your registrar, and you’ll get it.
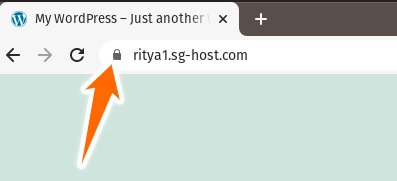
We have all our domains registered at Namecheap. And we will be using ritya1.sg-host.com for this guide.
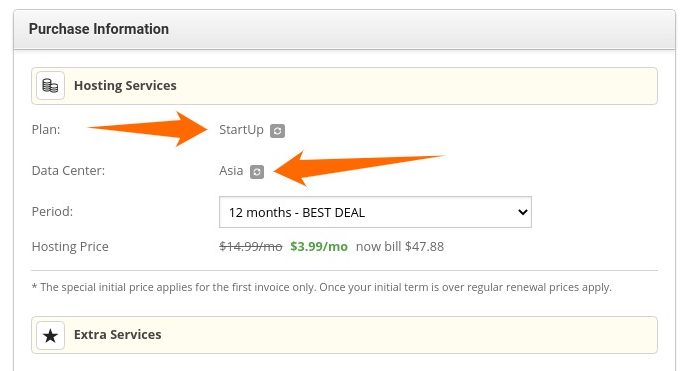
Click proceed and complete the purchase. On the subsequent pages, besides the regular checkout information, you’ll be able to change the data center. The best option is to choose the nearest. This section also gives you the option to change the hosting plan once more.
After successful registration and payment, you will receive a success email from SiteGround.
Now you’re ready to host your WordPress site. Let’s do it step-by-step.
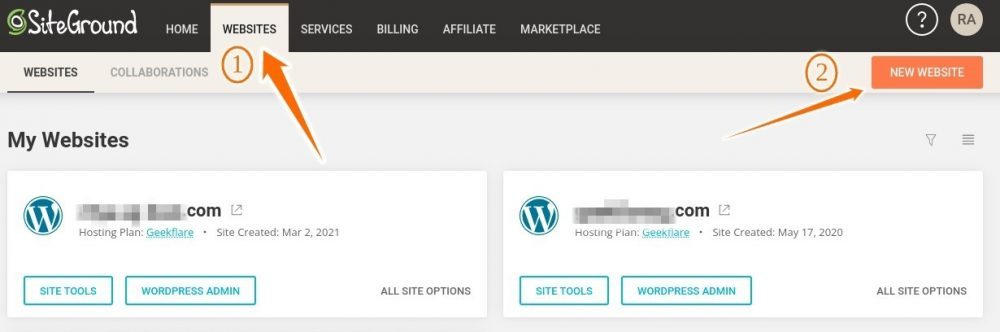
The first step is to login into the SiteGround customer dashboard. Next, click the Websites tab, and then select New Website.
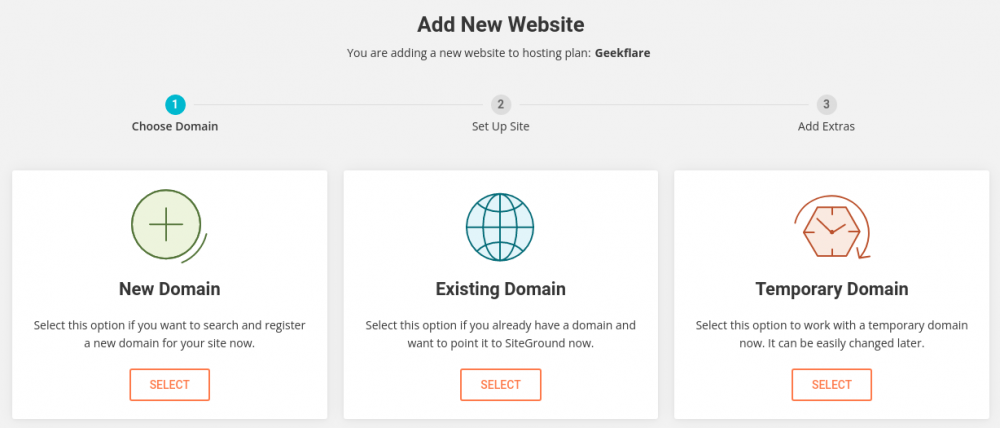
Afterward, get through the domain selection accordingly.
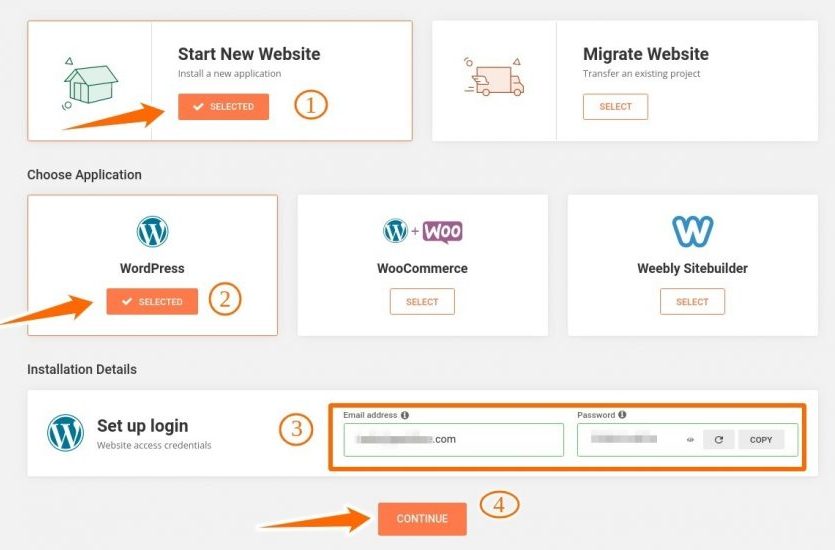
Now select Start New Website. Pick WordPress from the Choose Application tab, and enter the login credentials. Press Continue.
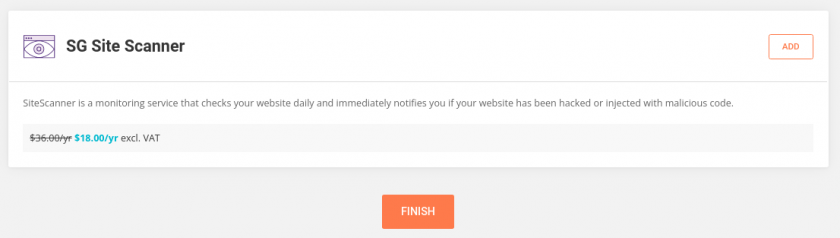
The subsequent screen will ask for adding extra services. Choose as per your preference and click Finish.
Conclusively, you will have this screen:

This gives three options:
At present, your website loads like this:
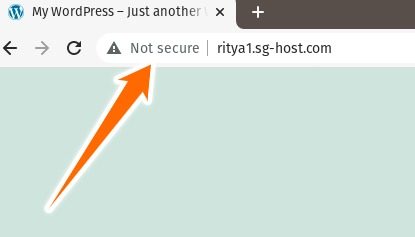
So to include the padlock instead of the Not Secure warning, the first thing is to add an SSL certificate.
An SSL certificate encrypts the connection between the browser and server. It helps to keep sensitive information from being stolen. And you can add one for free from your SiteGround Site Tools section.
Enter Security>SSL Manager. Then select the first option from the drop-down and click Get.
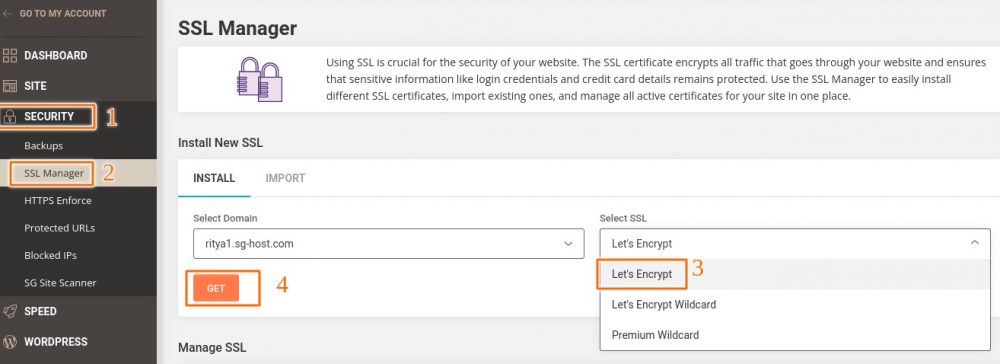
You can also select the Let’s Encrypt WildCard certificate. That’s best for a website having multiple subdomains. Wildcard SSL will protect all subdomains with a single certificate, while the standard option only installs an SSL certificate on the primary domain.
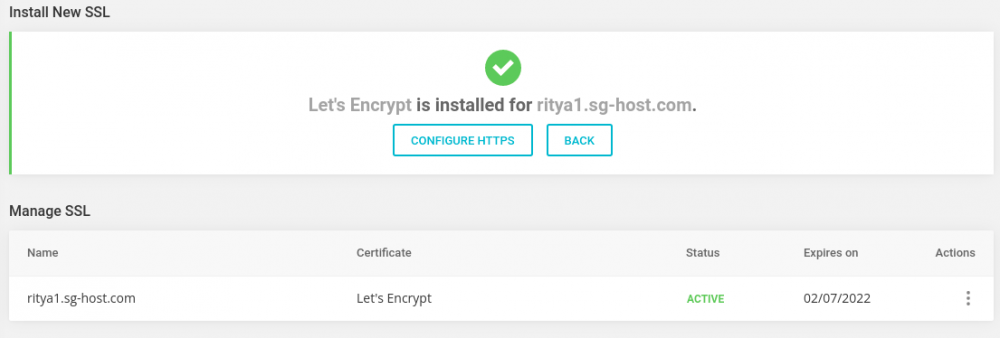
After you click Get, it will take some time for the installation. Finally, you’ll get the confirmation:
Now the remaining step is to ensure that the traffic goes through the encrypted connection (HTTPS). For this, select the HTTPS Enforce and then turn the toggle on.
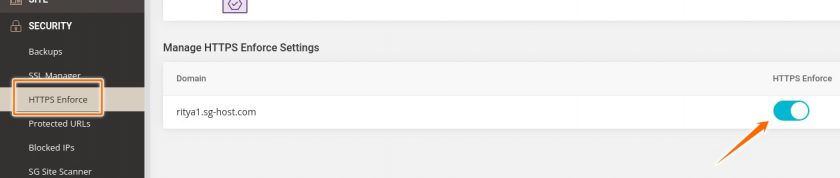
Load the site after some time, and you’ll see the padlock.
Let’s move ahead to activate the free version of Cloudflare CDN.
A Content Delivery Network reduces loading time to your website for users spread across the globe. In addition to speed, this integration will boost your website’s security as well.
For activating Cloudflare CDN, navigate to SPEED>Cloudflare, then click SET UP.
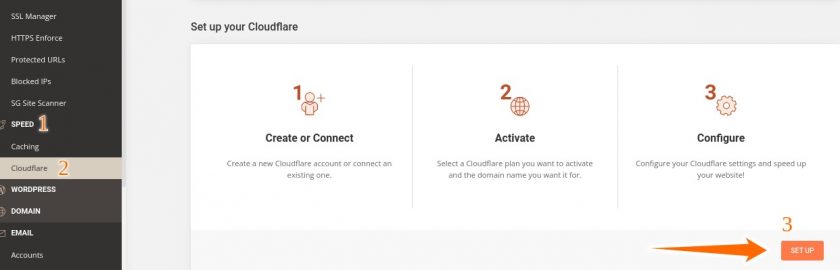
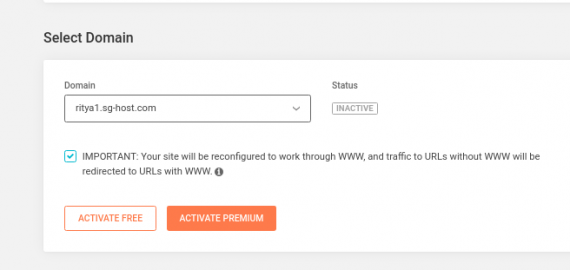
Next, you can either create a new account or connect an existing one. Subsequently, the screen gives the option to Activate Free or Premium Version. Select accordingly and activate.
 |
 |
SG Optimizer comes pre-loaded for SiteGround users. You can further tune-up your site for better performance.
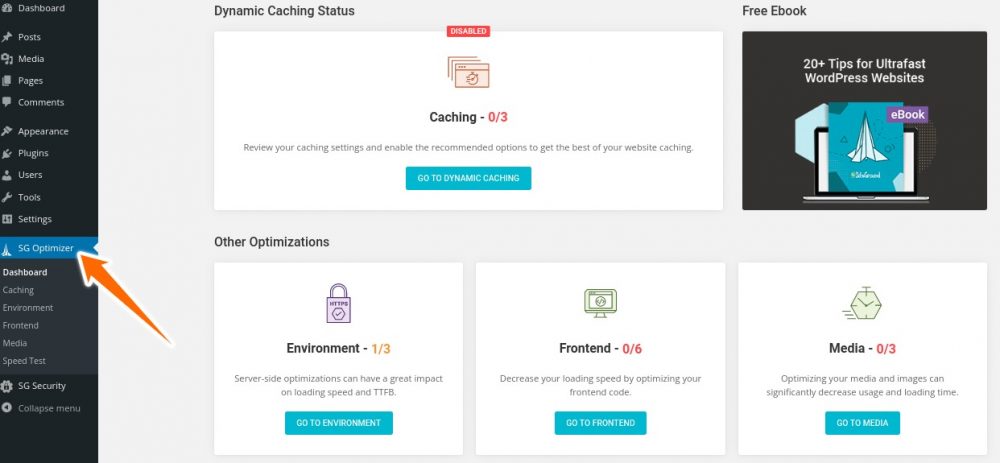
As a thumb rule, you can navigate to each tab (Caching, Environment, Frontend, and Media) and take the recommended action. For instance, when you click Caching, there are three suggested options along with others.
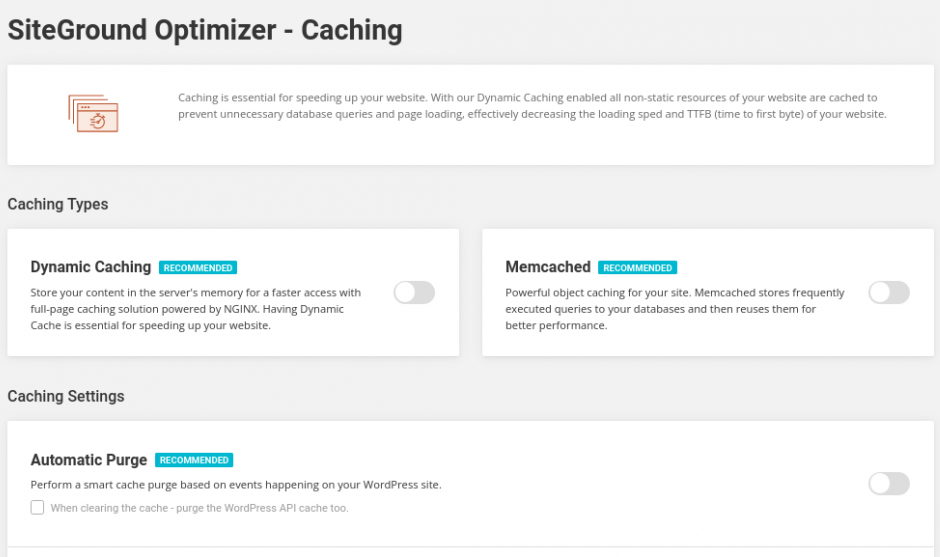 Go through the help text given with each one and proceed accordingly. While it’s best to consult a web developer, the recommended options are generally safe to activate.
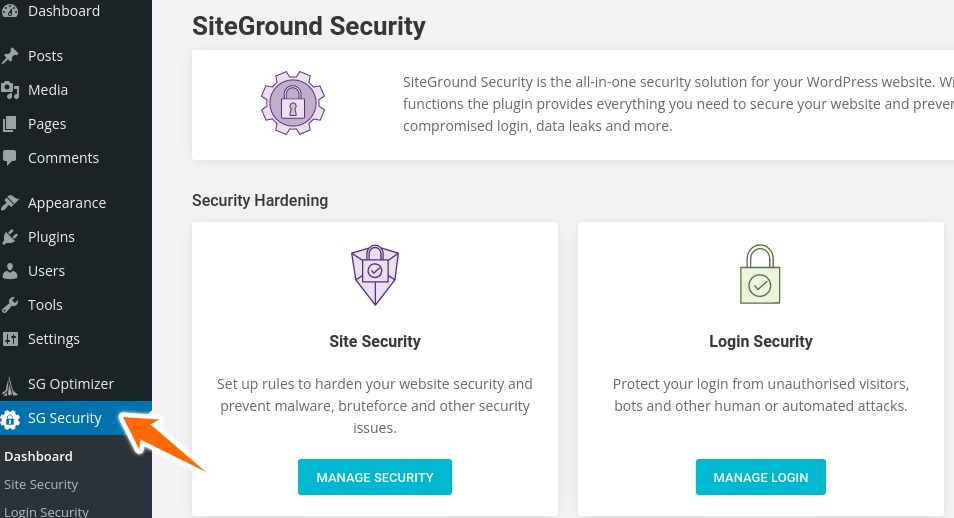
This presents a set of functions to bolster your defenses against unauthorized visitors and brute force attacks.
Most options are turned on by default in Site Security, except the two:
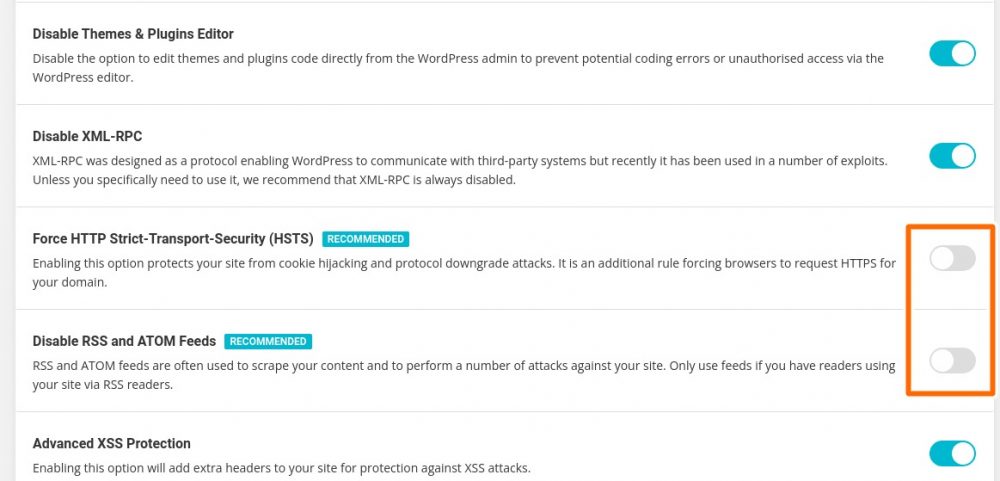
While you can turn on HSTS to ensure HTTPS connections, disabling RSS and ATOM feeds can do more harm than good, especially if you’re a creative.
But if blogging (or like) takes the back seat on your agenda, you should also turn on this option.
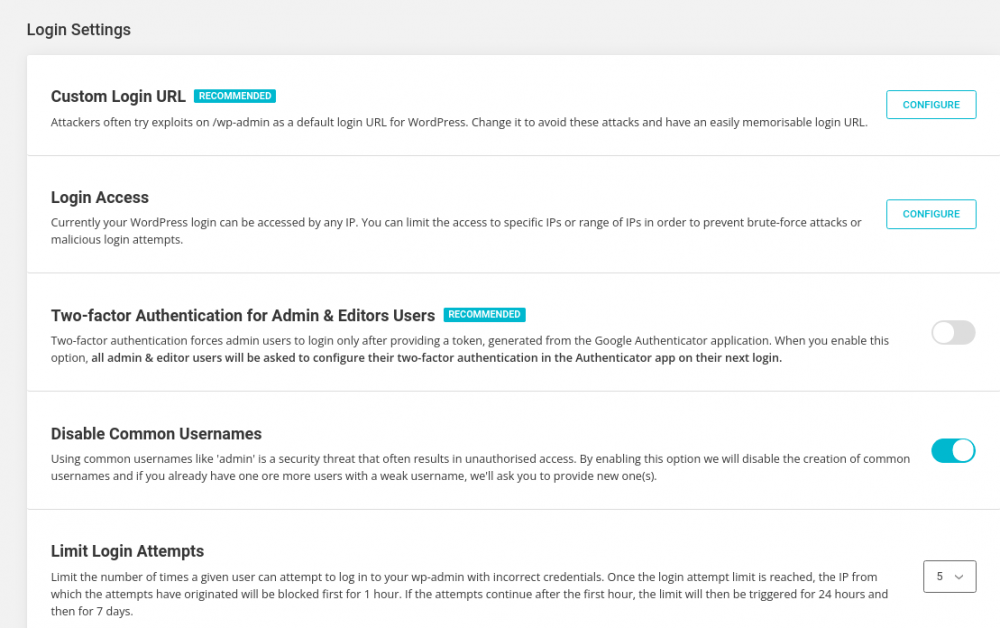
Next comes Login Security. This shields your website from brute-force login attempts. You can set a custom login URL, set specific IP addresses for login, and limit failed login attempts.
But the easiest and fool-proof option can be enabling two-factor authentication. This would send a time-bound code on Google Authenticator every time you log in. It’s one of the most robust login security tactics to safeguard from malicious login attempts.
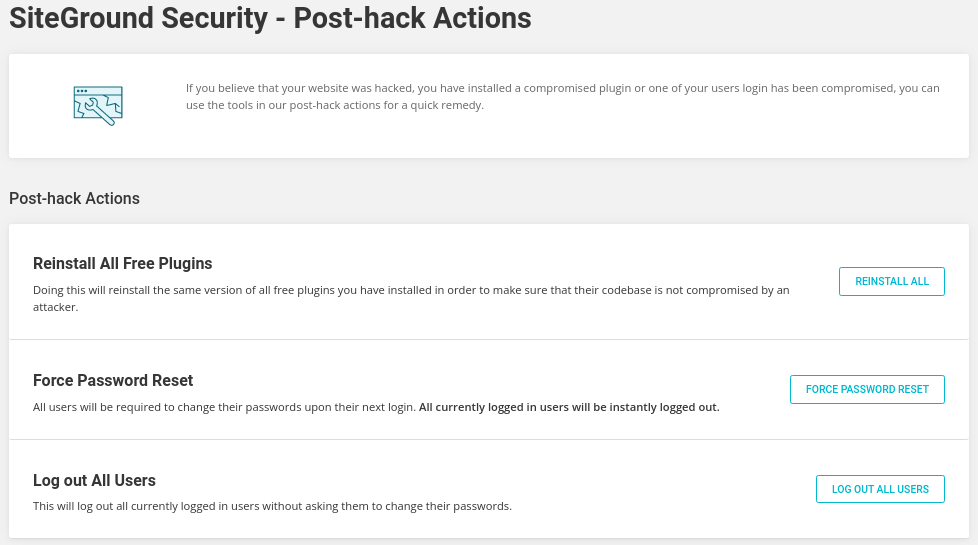
SG security also has a post-hack to-do list for the fateful day. It helps you reinstall all free plugins, force all users to change passwords, and log out all users from their active sessions.
Conclusively, SiteGround has a powerful security system in place. The users can easily use these options with just a toggle.
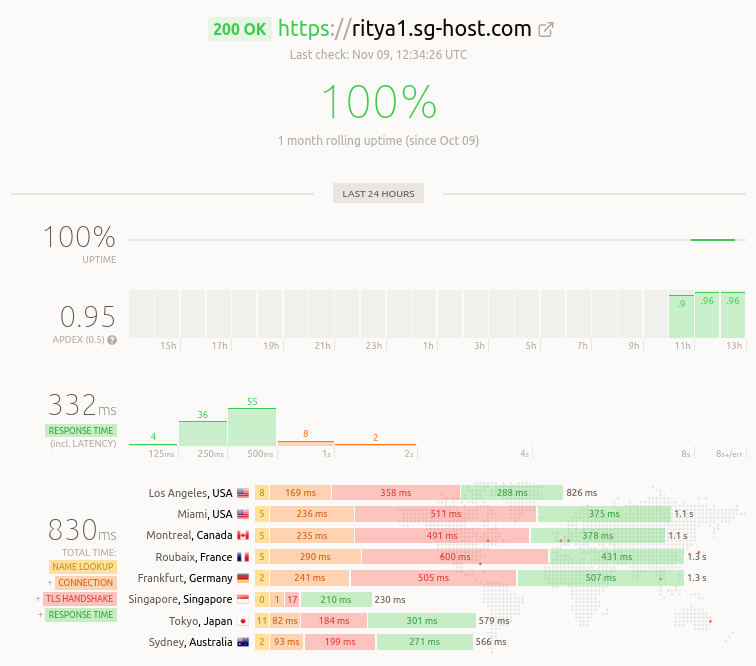
Uptime is a crucial parameter for every website. We’ve added this site for uptime monitoring.
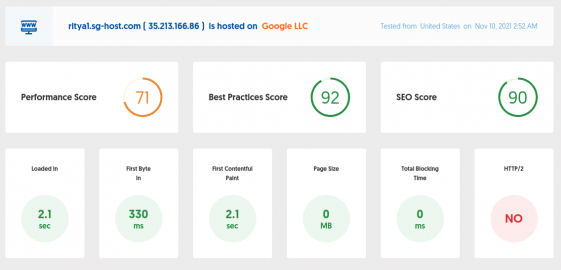
Speed is subjective to many factors, including the number & type of plugins, web-content size, etc. Even then, you can use our own website audit tool to get details about various speed metrics for this test website and others.
For starters, we have tested this website with our own tool and Pingdom Website Speed Test twice.
First, in its normal state, and second, after turning on all the SG optimizer’s recommendations along with 60% image compression.
Here are the results.
Before tuning:
 |
 |
After tuning:
 |
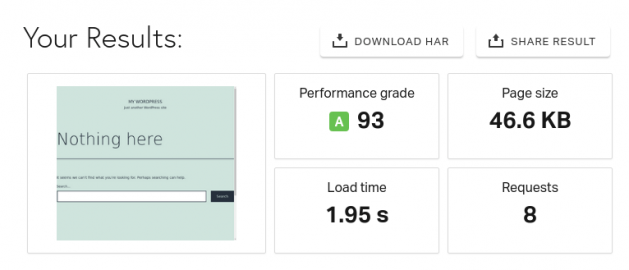 |
Our in-house tool suggested a clear improvement in loading time, time to first byte, loading of first contentful paint, and overall performance score.
And Pingdom tool witnessed an enhanced performance grade, lower page size, and reduction in loading time.
While the numbers are nothing to celebrate, it was just a single-page default website with negligible content. A fully-fledged website loaded with text, animations, images, etc., will show better figures.
Managed WordPress hosting is the simplest way to build a website. And with SiteGround, it is secure, fast, and user-friendly.
SiteGround’s default tools make the installation look easy. It further minimizes the need for 3rd-party plugins to enhance security and performance.
Only after having a website hosted on SiteGround, can one understand why it is the most sought-after hosting provider.
In addition to several reasons, there is one – it simply works.


Invicti uses the Proof-Based Scanning™ to automatically verify the identified vulnerabilities and generate actionable results within just hours.
Try InvictiWeb scraping, residential proxy, proxy manager, web unlocker, search engine crawler, and all you need to collect web data.
Try BrightdataVultr features the latest generation CPUs and an intuitive control panel, along with 100% KVM virtualization.
Try VultrSemrush is an all-in-one digital marketing solution with more than 50 tools in SEO, social media, and content marketing.
Try Semrush